Building a Forensic USB Drive: Tools and Techniques for Imaging [ PART 1.5 ]
![Building a Forensic USB Drive: Tools and Techniques for Imaging [ PART 1.5 ]](https://threat.boutique/content/images/20241019113239-Designer (3).jpeg)
Background: In a previous article, I discussed the high-level preparations needed to acquire an image of a machine requiring forensic analysis. However, have you considered the caveats related to that action? In this article, we will discuss those challenges and provide a step-by-step guide at a technical level. This will help you prepare your toolset for HDD/image acquisition, which will be used in incident response.
Introduction Level: We know that systems can boot in UEFI and Legacy modes, and this is the first challenge we need to prepare for. Additionally, we must ensure that the integrity of the cloned scope is maintained during the imaging process, as this can be critical in the event of legal action. The third challenge is to choose the appropriate toolset for taking the snapshot/image.
Abstract level of action:
We have a USB drive with a live operating system that should be booted into the system from which we need to take a snapshot. Immediately after that, we need to prepare external storage to store the preserved file.
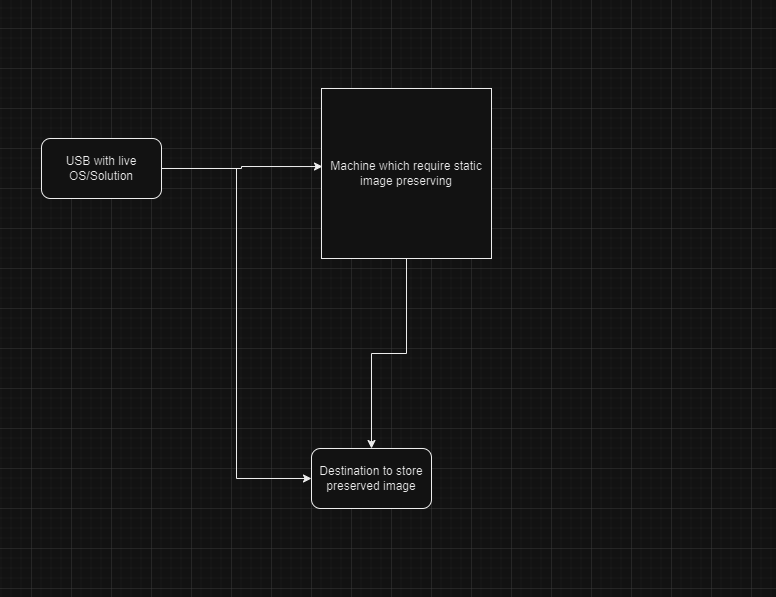
Technical Level UEFI and Legacy Support: One of the first approaches is to ensure that the live USB supports both standard boot modes based on the system where the actions need to be performed. For that reason, we have three ways to achieve this result.
- Create your own live operating system using your preferred platform.
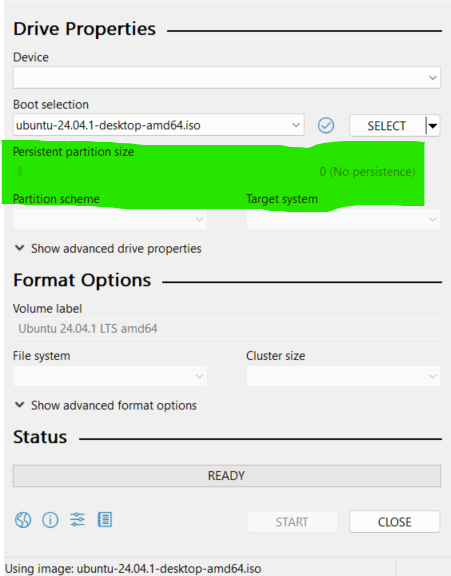
Nowadays, there are many Linux distributions that allow you to create a live USB. However, one challenge is that these distributions often lack built-in capabilities to preserve packages after each system restart, which is essential for taking snapshots and performing various forensic actions. To address this, the newly created system needs a partitioning stage to enable persistence. For this purpose, we can use tools like Rufus, which can create storage for that functionality.
Legacy Mode systems -
We can use already out of box image which name is OSFClone [ Link ]
UEFI Mode systems -
We can use out of box image which name is CAINE [ Link ]
Integrity: One important aspect of these challenges is that all disks from which we need to take a snapshot, including the live USB, should be set to read-only mode. To achieve this, some existing solutions load disks in that mode. When implementing your own Linux live USB, you should ensure that this scenario is addressed.
Preparation suggestion:
- As an incident responder, you should have two separate USB drives: one for Legacy systems and another for UEFI systems.
- You need to have external storage with the capability to connect to any system via USB, with a minimum capacity of 2 to 3 TB.
- After taking a snapshot, always document the hash value of the image along with the separate files.
- For systems with BitLocker capability, always remember to back up the recovery key.
- For cloud-based systems, the approaches are different, and traditional methods may not be applicable for those purposes.
Conlusion: Always keep in mind that the noted approach will not work for volatile memory acquisition. Valuable data from the examined system can be lost after the system is shut down. For this reason, I strongly advise prioritizing memory dumping before proceeding with this action. I will provide strategies on how to dump volatile memory in my next article.
Happy Hunt ! Jok3R